Product brochure
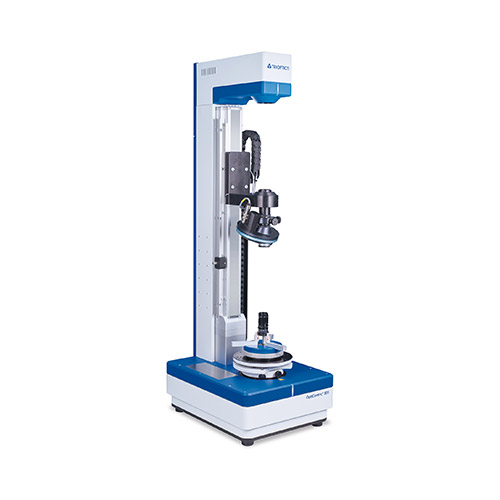
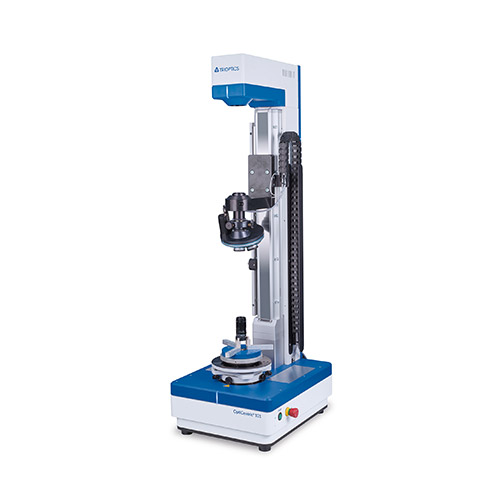
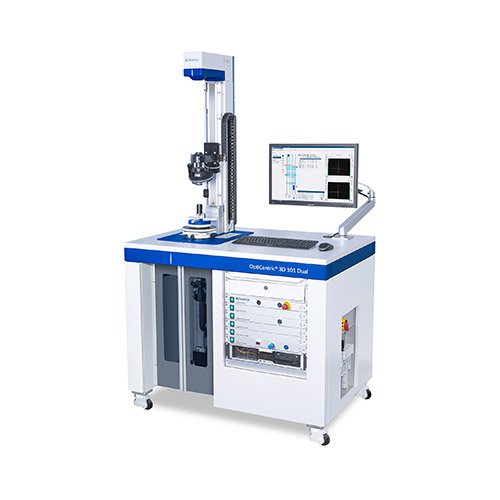
OptiCentric® 101
The industry standard for lens centering taken to the next level
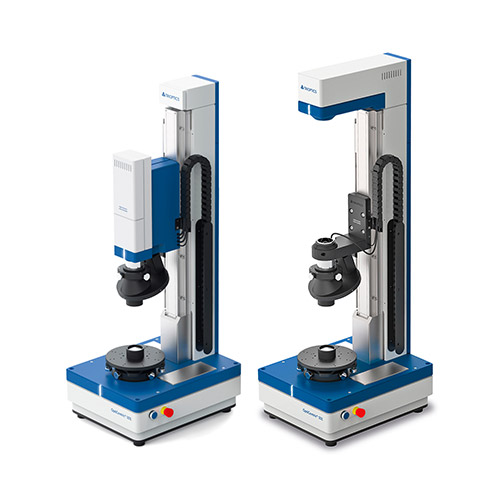
OptiCentric® 101 IR
VIS, MWIR and/or LWIR measuring capabilities in one instrument
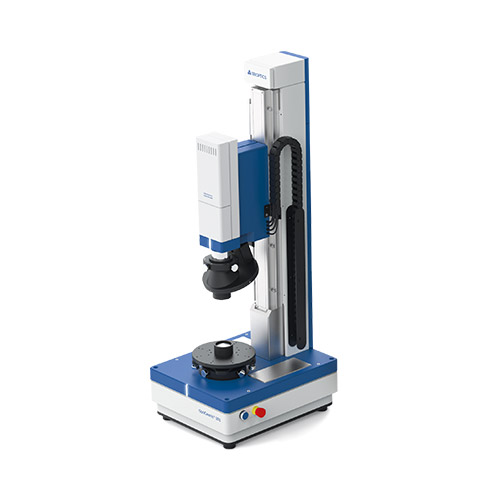
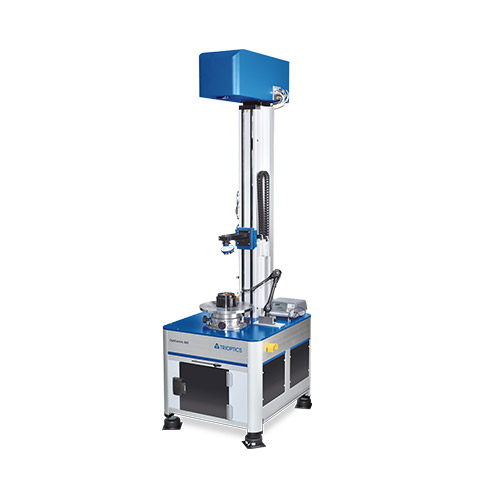
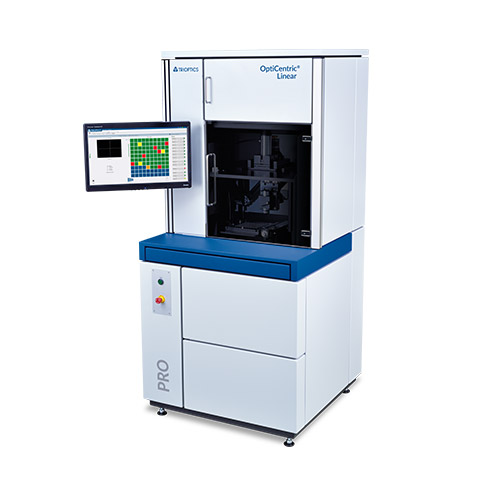
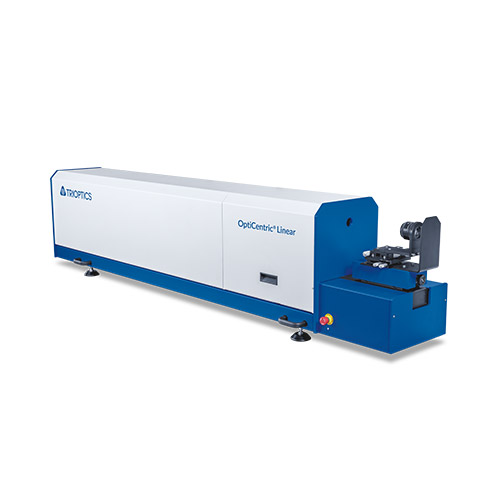
OptiCentric® Linear
Rotation-free centration measurement increases speed and flexibility
OptiCentric® Linear PRO
Automated high speed inspection and centration measurement of lens systems
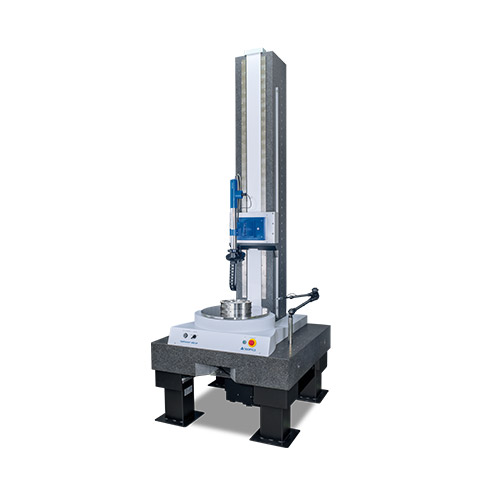
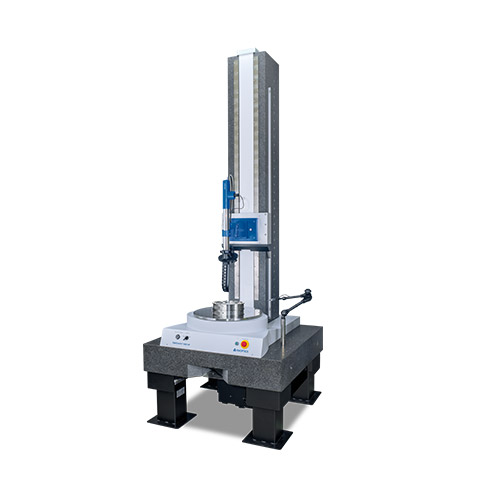
AspheroCheck® UP
Fully automated centration testing of aspheres
CylinderCheck
Measurement of cylinder lenses: Contact-free, flexible and fast
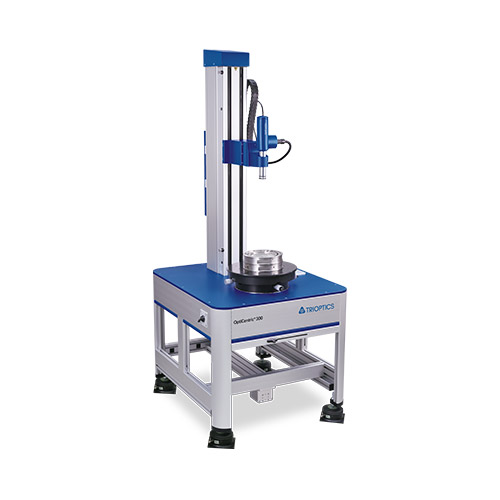
OptiCentric® with lens rotation device
The industry standard for centration measurement of lenses
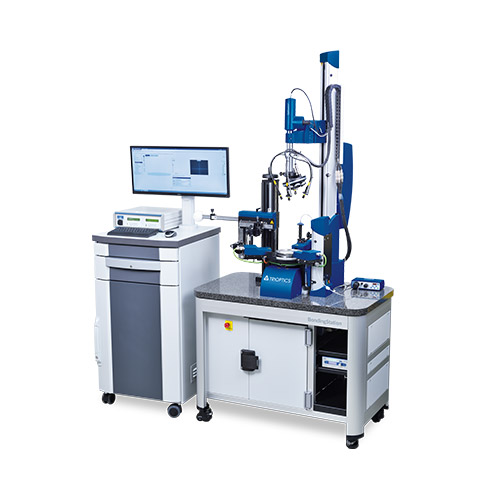
OptiCentric® & LensAlign 2D Air
Automated and efficient alignment of doublets
OptiCentric® & LensAlign 4D
High precision alignment of micro lenses on an arbor with four degrees of freedom
Robotic Loading of the Centration Measurement System OptiCentric® 100 and the Alignment Turning Station ATS 100 for Serial Production
Literature

Strategies for Active Alignment of Lenses
SmartAlign – A software solution for OptiCentric®
MultiCentric® Cementing – Multiplies the Efficiency of the Lens Alignment and Cementing Processes
OptiCentric®
High-precision centration test devices, alignment, cementing and bonding systems
The OptiCentric® product group represents the global standard for optical centration testing and manual and automated cementing and bonding of lenses and lens assemblies. With its extremely high degree of centration accuracy and integrated operation, OptiCentric® systems are indispensable in modern optics productions. It makes no difference whether the sample has a small or very large diameter, works in the visual or infrared spectral range, or is to be cemented, bonded or just measured: modular OptiCentric® systems permit a wide range of different applications and samples for optimum composition.
Applications
Fulfillment of all measuring tasks in the area of centration
With their multitude of applications, particularly for the centration testing of individual optical components and lens systems, OptiCentric® systems are used for all the testing steps between the incoming inspection of individual components, assembly support and final inspection. The necessary measuring tasks can be carried out separately from alignment and production processes or in combination with these.
Center thickness and air gap measurement in combination with centration testing
For the time-saving and comprehensive testing of lens systems, all OptiCentric® systems can be enhanced by the measuring option for center thickness and air gap testing.
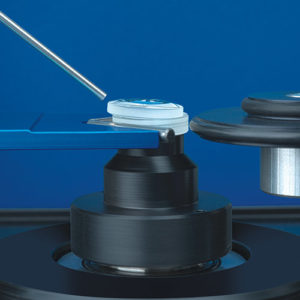
Alignment of cemented elements
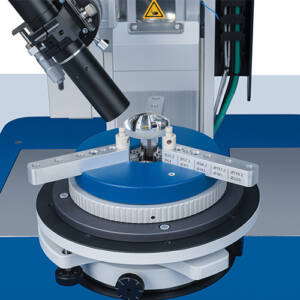
The manual alignment of cemented elements by malling or air blasts can be carried out with all OptiCentric® systems. There are various rotation and holding devices available for holding the lower lenses.
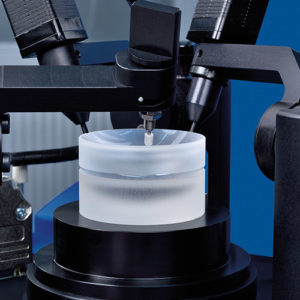
Automated cementing of doublets
For the automated alignment of cemented elements, there are special attachments called LensAlign available for all OptiCentric® systems.
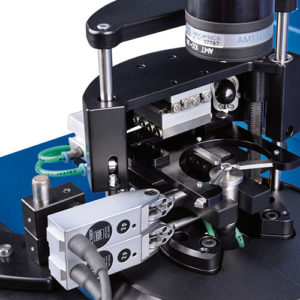
Automated alignment centering of lenses on a centering arbor
The cementing of lenses on an a arbor for later edge centering is an automated process and is thus independent of the user for all OptiCentric® systemes with LensAlign.
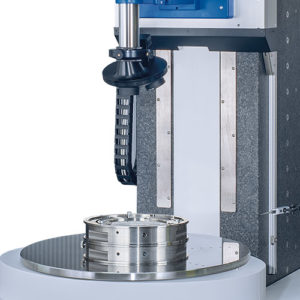
Bonding of large optics
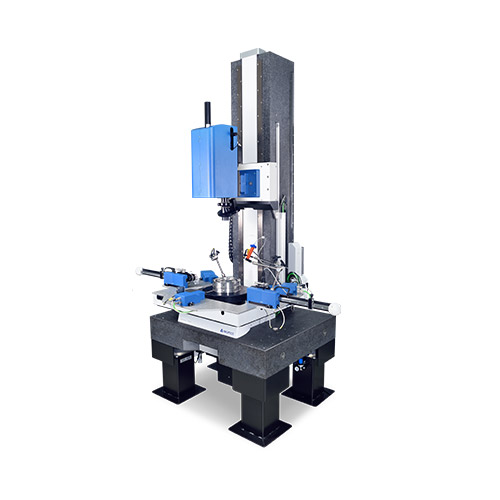
For alignment and bonding of large optics into its cell, all OptiCentric®UP Systems are suitable.
Automated bonding in two degrees of freedom
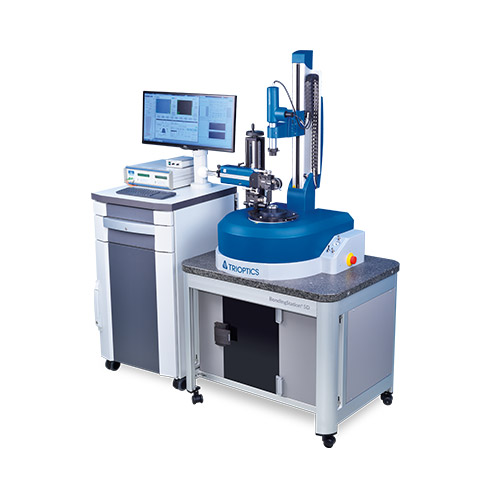
Centered positioning and bonding of a single lens or cemented element into a cell with two degrees of freedom is taken over the OptiCentric® Bonding 2D.
Automated bonding in five degrees of freedom
The free alignment and bonding of an optical system into a frame without mechanical constraint sizes in five degrees of freedom is possible using the OptiCentric® Bonding 5D.
Centration testing of aspheres
The checking of centering and tilt of aspherical surfaces is carried out either using a combination of an OptiCentric® systems with the attachment AspheroCheck® or using the complete system AspheroCheck® UP.
Centration testing of surface groups within infrared lens assemblies
In order to test the inner surfaces of IR lens assemblies as well, all OptiCentric® systems are also available in a version optimized for the IR-wavelength range.
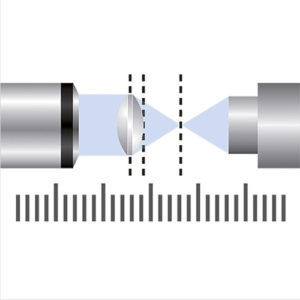
Measurement of effective focal lengths and back focal lengths, flange focal length, radius and axial MTF
In addition to centering error measurement, all OptiCentric® systems can be extended by the OptiSpheric® measuring option for effective focal length and back focal length, flange focal length, radius and MTF measurement.
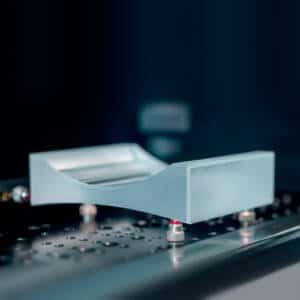
Centration test for cylinder lenses
For the testing of cylinder lenses, all OptiCentric® systems are suitable in combination with the attachment CylinderCheck.
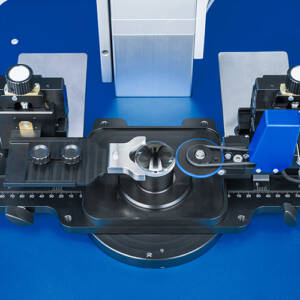
Centration testing of spherical lenses
This standard task is permitted by all OptiCentric® systems. There are various rotation and holding devices available for holding the lenses.
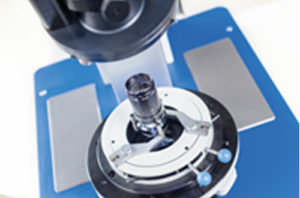
Centration testing of optical systems
AllOptiCentric® systems with air bearing are suitable for the testing of optical systems incl. all interior surfaces. If the system is made up of more than 20 surfaces, the Dual variant is recommended, and for measuring air gap and center thickness the version 3D.
Coffee break
No time for long explanation videos?
Get the essentials on a wide range of technology topics during a coffee break.

Product Overview
The size of the sample – in particular diameter and weight – has a major influence on the composition of units used. The base unit is generally selected on the basis of these criteria. The functionality of each base unit can be further enhanced (Expansion stages).
To make measurement of these different sample dimensions possible, the measurement head is mounted to a height-adjustable stage. The measurement point of the autocollimator measurement head can be moved flexible and precisely into the measurement position of the sample by a motorized fence. The entire measurement process, for example for measurement and alignment of multilens assemblies, can be fully automated.
Expansion stages
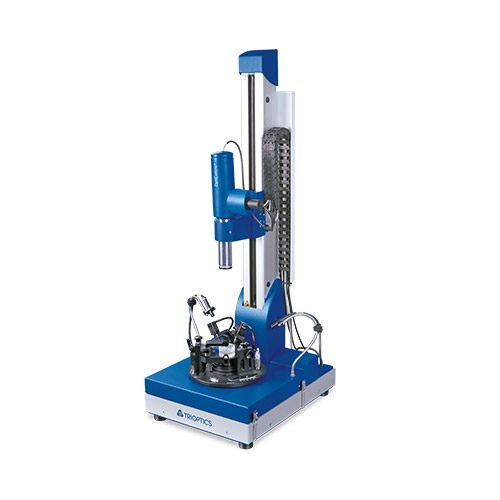
LensAlign
Automated alignment and cementing
OptiCentric® with LensAlign makes a significant increase in alignment precision possible and manufacturing throughput.
Automated and efficient alignment of doublets
High-precision alignment of micro lenses on an arbor with four degrees of freedom
Novel process for production of microlenses with increased centeringaccuracy and imaging performance
Complete systems
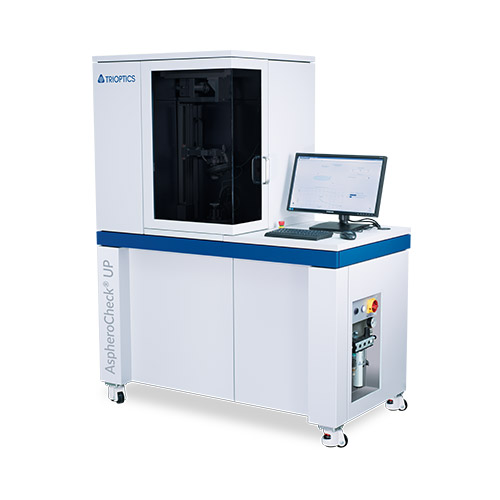
AspheroCheck® UP
Fully automated centration testing of aspheres
AspheroCheck® UP permits the automatic testing of centering error and tilt of aspheric lenses
Fully automated centration testing of aspheres
Automated asphere centration testingwith AspheroCheck® UP
Software
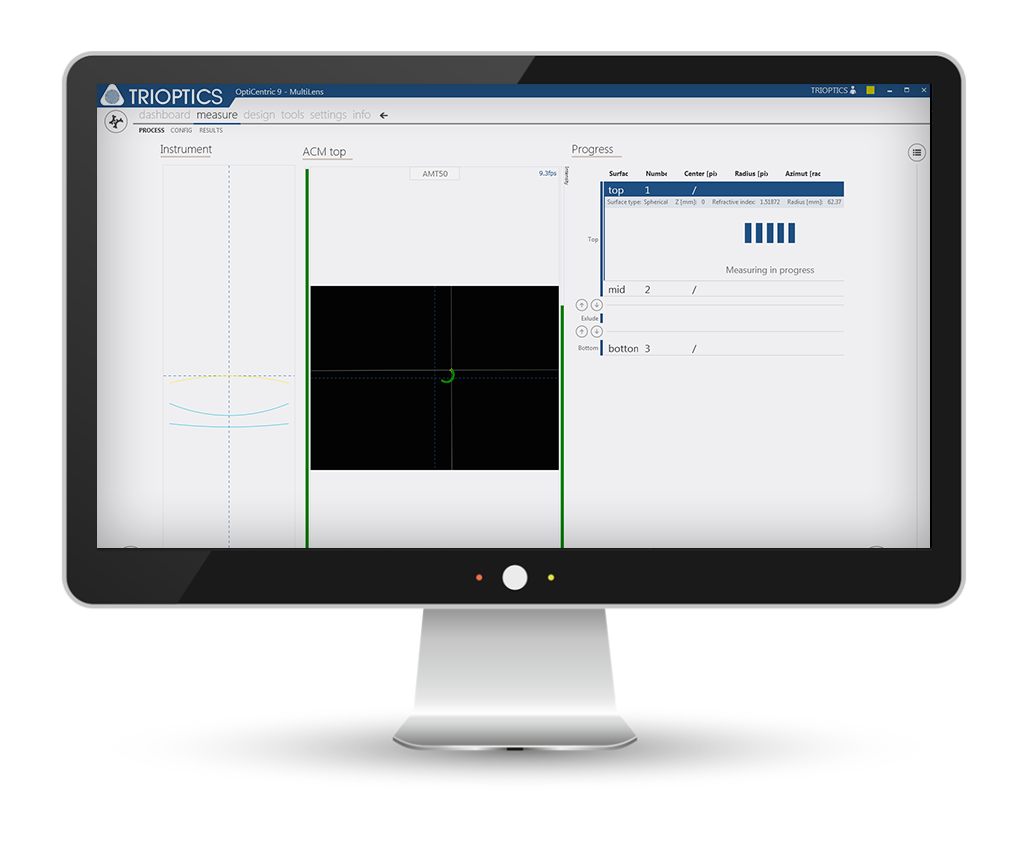
The user of an OptiCentric® system controls the entire measurement, alignment and cementing process via the OptiCentric® software. This software controls the components – no matter whether standard or optional module – and the measurement process. Measurements and evaluations take place easily, quickly and highly accurately. The integrated static analysis permits reliable and standardized evaluation as well as output of measurement certificates.
- Immediate checking of the measurement process through real display of the measured values during measurement of the centering errors
- Coordinated control and evaluation of all axes for efficient measurement
- Data capture and evaluation of all integrated sensors provides immediate results
- Auto-focus makes reproducible measured values possible
- Optional software extensions for the measurement of lens assemblies, aspheres and cylinder lenses
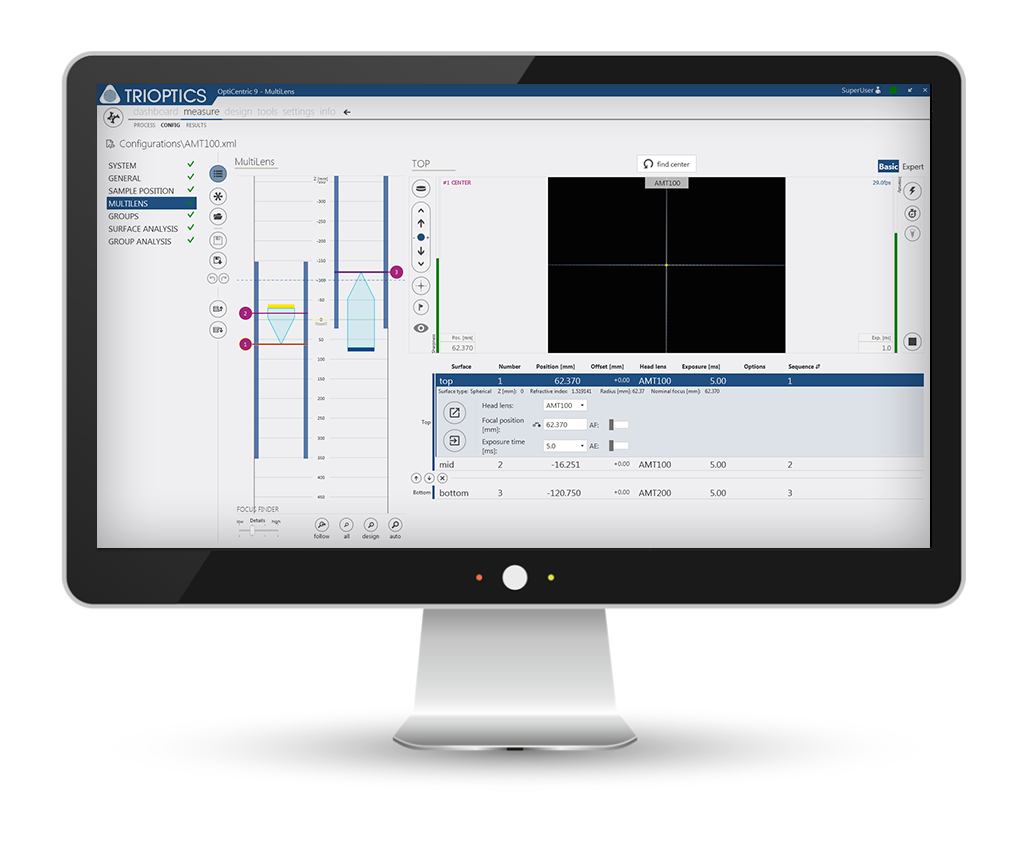
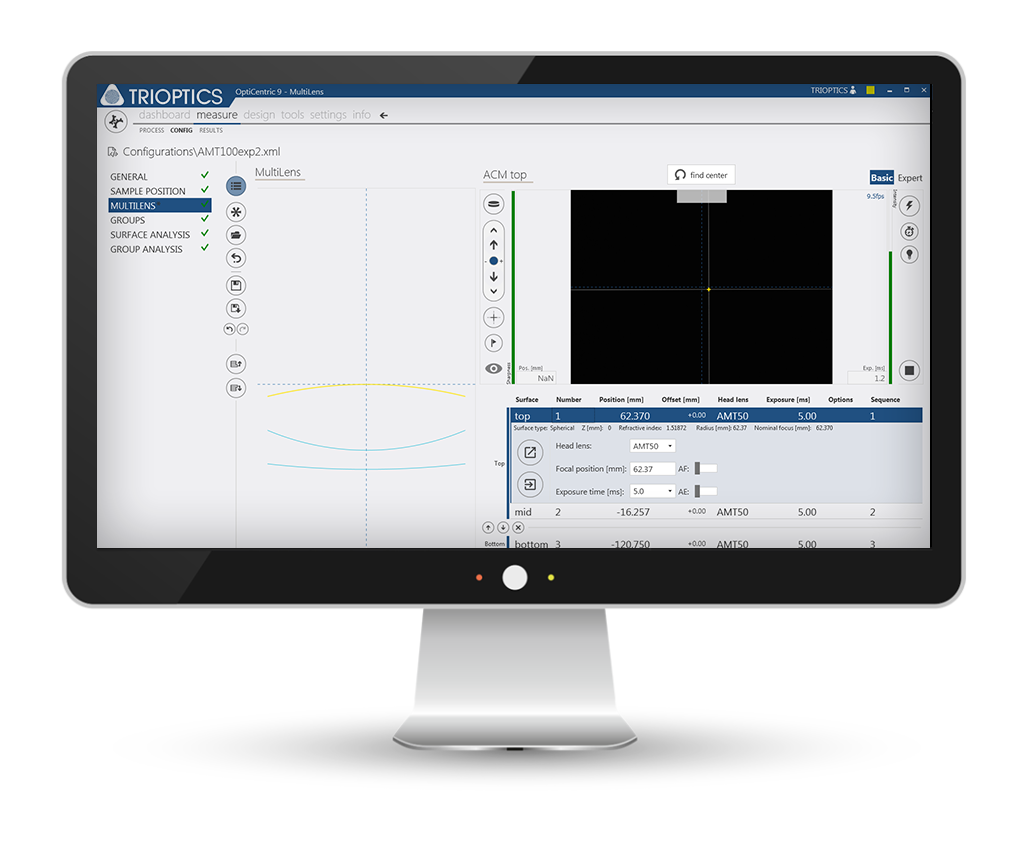
- Patented MultiLens software module for the measurement of complex lens assemblies
- Centering error calculation and alignment independent of the measurement environment through a freely definable mechanical or optical reference axis (SmartAlign)
- Data import and export allows fast and complex documentation
- Immediate evaluation of sample quality through scrap analysis according to individual testing criteria.
- Optimized production workflows thanks to application-specific user interfaces for cementing and bonding, further customer-specific adaptation on request
The high-performance modules MultiLens and SmartAlign turn OptiCentric® into a high-precision system for the testing and manual or automatic alignment of complex lens assemblies as well as for the measurement of planar optics.
MultiLens: Measurement and alignment of objectives towards a freely selectable reference axis
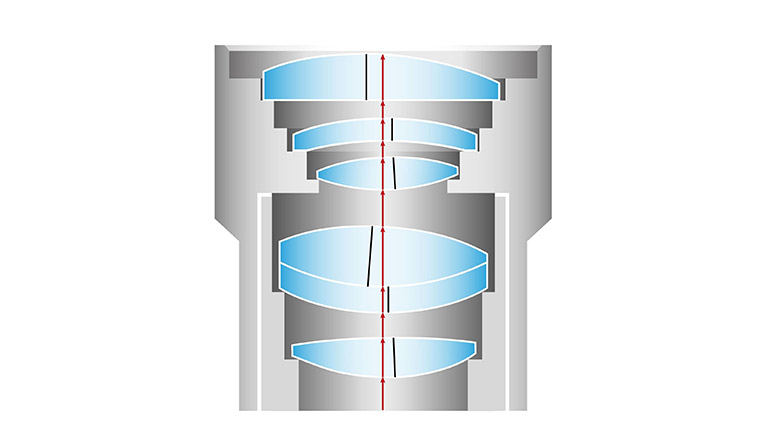
MultiLens is the software module for measuring and aligning lens assemblies. The centering errors of each individual surface of a lens assembly and the centering of the system are determined non-destructively. With this information, the centration of a single lens or a sub-group can be calculated with respect to a freely selectable reference axis.
SmartAlign: Correct centering errors automatically
With the SmartAlign Module, the position of the measured centering error is analyzed in reference to a user-defined optical or mechanical axis. This unique tool is used especially successfully in the automated LensAlign alignment modules and bonding systems.
Upgrades & Accessories
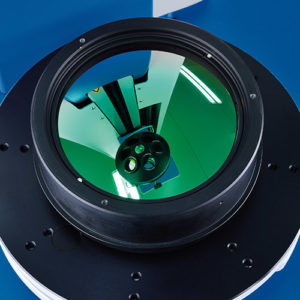
A precise pivot bearing represents the measuring reference of high-precision centration testing. All OptiCentric® systems are equipped with an air bearing, optionally a mechanical lens rotation device can be used for measurement of single lenses and doublets.
An OptiCentric® system equipped with an air bearing is required for the following applications:
- Testing lens assemblies
- Setting up lens assemblies
- Alignment of doublets with the optical axis of the lower lens as reference
- Alignment and centering of lenses on a centering arbor with the arbor axis as reference
- Testing of aspheres using the AspheroCheck ® module
- Single lens measurement on sensitive lenses e.g. calcium fluoride lenses

Manual tip-tilt table (TRT)
OptiCentric® systems use tip-tilt tables to align samples. The decoupled movements of the tip-tilt tables allow for precise positioning of the sample or sample holder. Tip-tilt tables are available in different diameters for a variety of applications and measurement systems.
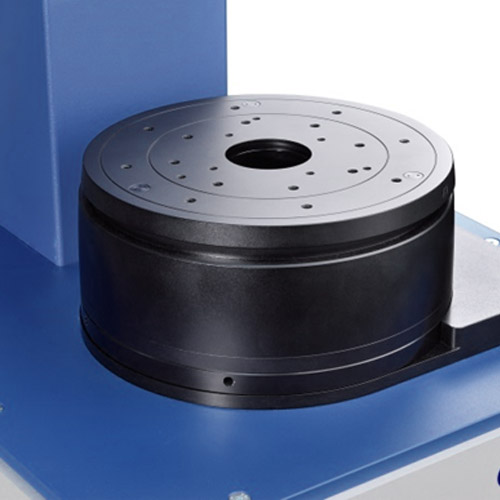
Motorized tilt and translation table (TRT)
For easier sample handling during measurement or setup of an optical system, the OptiCentric® 3D 100 in particular can be equipped with a tilt and translation table (TRT). Instead of the traditional manually alignement, the motorized TRT tilts and shifts the sample such that the optical axis of the lens is aligned to match the reference axis of the system. This is performed fully automated and embedded in the process flow, thus permitting a shortened test cycle.
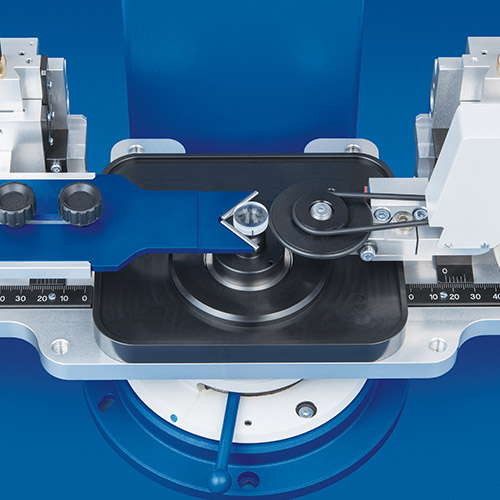
Lens rotation device
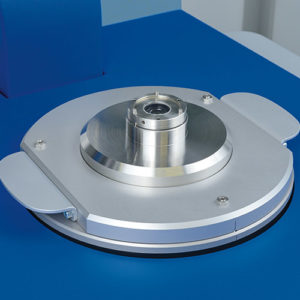
The motorized rotation device is a rotation device to
- measure single lenses with a diameter up to 200 mm using the outer edge and the center of curvature of the lower lens as a reference
- cementing doublets. In this case, the reference axis comprises the center of the circumference and the center of curvature of the lower lens.
No air bearing is required for the motorized rotation device. Equipped with a so-called “bridge”, the lens rotation device can be operated on OptiCentric® 100, 101 and 300 units which are equipped with an air bearing.

LensAlign 2D Air
The module LensAlign 2D Air enhances OptiCentric® systems by adding a software-controlled air manipulator and offers a cost-efficient solution for an entry-level active automated lens alignment. As the process enabled by LensAlign 2D Air does not require operator interaction, a persistent sample quality and an improved process safety can be guaranteed.

LensAlign 2D Standard
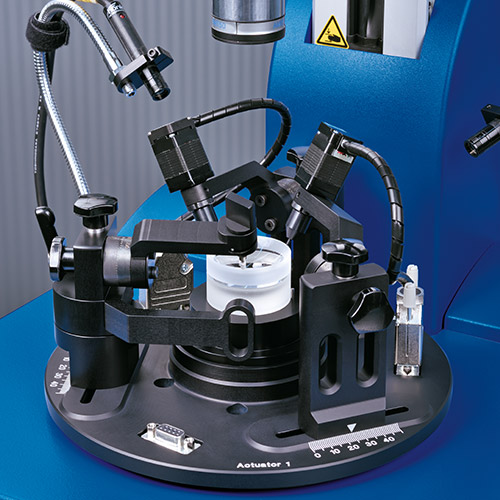
An OptiCentric® system that is equipped with the LensAlign 2D Standard for cemented elements aligns and cements lenses with a geometry of D/(2R) ≤ 0.7. The unit can be easily adapted to different lens sizes and is recommended when lenses have to be cemented together to the optical axis within short notice.
LensAlign 2D Advanced
The LensAlign 2D Advanced module was developed to meet the increased requirements of our customers. The LensAlign 2D Advanced aligns all lens geometries, including:
- Lenses with D/(2R) > 0.7
- Hemispherical lenses
- Doublets where the edge of the upper lens is not accessible
- Lenses with tight tolerances for the cement wedge
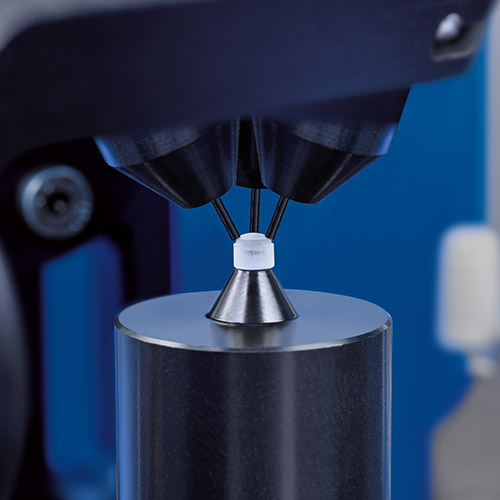
LensAlign 2D Advanced for micro-lenses
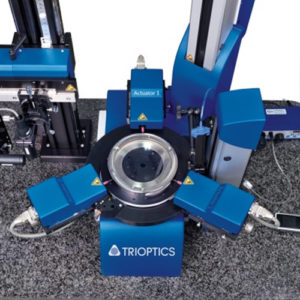
Equipped with three actuators, the LensAlign 2D Advanced module permits the alignment of micro-lenses. There are no limitations to lens geometry here.

LensAlign 2D Standard
The LensAlign 2D Standard for the alignment and centering of lenses to an arbor is suitable for lenses with a geometry of D/(2R) ≲ 0.7. The unit can be easily adapted to different lens sizes and is recommended when lenses have to be cemented to the arbor axis quickly. Following alignment and centering on the arbor, the process can be continued for the alignment of further lenses.

LensAlign 4D
LensAlign 4D represents a module for the OptiCentric® 100 that enables the cementing of a small lens to a mechanical reference axis, such as an arbor or cell. In this setup, alignment is performed without the constraint of a mechanical lens seat, which can restrict lens alignment. For precise positioning, the lens is positioned on a thicker layer of adhesive and initially held by a micro-gripper, which shift and tilts the lens in four degrees of freedom until the optical axis aligns with the mechanical axis. This achieves a high precision alignment. Following alignment and centering on the arbor, the process can be continued for the alignment of further lenses.
OptiCentric® systems determine the centering errors of optics, with a high degree of accuracy and in real time. The measurement head required for this comprises an electronic autocollimator with camera and LED lights with reticle.
TRIOPTICS supplies two measurement heads for the OptiCentric® systems, from which the suitable one must be selected depending on the application:
- VIS measurement head (standard)
- IR measurement head for testing MWIR and LWIR lens assemblies
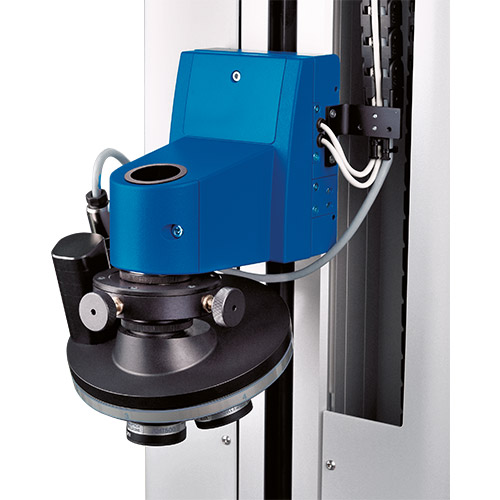
Changer for head lenses
In order to be able to focus on the center of curvature (reflection measurement) or on the focus position (transmission measurement) of different lenses, the measurement heads are equipped with head lenses, resulting in unbeatable benefits:
- Optimized magnification for each individual lens surface
- Practically unlimited measurement range
- No long, time-consuming movements of the measurement head
In order to be able to replace the head lenses quickly and without complications, it is possible to equip the systems with manual or motorized turrets.
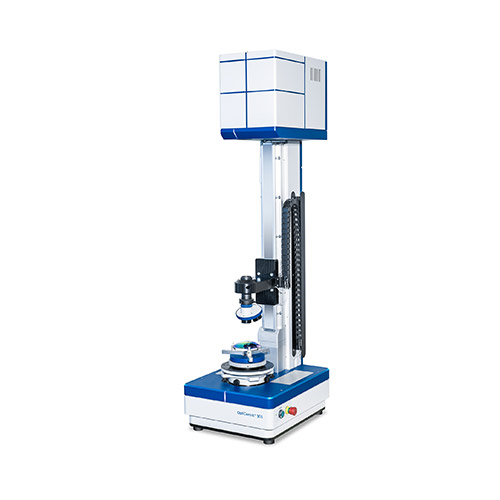
Precisely test IR lens assemblies
OptiCentric® 101/300 IR is TRIOPTICS’ solution for centration testing of infrared optics. The system is equipped with a flexible-changeover VIS-MWIR and/or VIS-LWIR measurement head and can test all types of infrared optics.

OptiSpheric® upgrade: supplementary optical measuring parameters
The OptiSpheric® upgrade can be used for the comprehensive testing of optical parameters in one unit. With this, the measuring range is extended by the following parameters:
- Effective Focal Length (EFL)
- Back Focal Length (BFL)
- Flange Focal Length (FFL)
- Radius of curvature
- Modulation Transfer Function (MTF) on-axis

OptiSurf® upgrade: Measurement of center thickness and air gaps
For the complete opto-mechanical characterization of optical systems which are already mounted, the OptiSurf® low-coherence interferometer is integrated into the OptiCentric® system, which is then called the OptiCentric® 3D 100. This combination of both measurement systems results in a significant increase in measurement accuracy. The center thicknesses and lens distances can only be determined with maximum accuracy as a result of the highly accurate centration testing and subsequent adjustment of the sample. The center thickness and the air gaps within a lens assembly of up to 800 mm in optical thickness are measured in a single scan. Operation is also extremely simple thanks to complete integration in the OptiCentric® software.

CylinderCheck
CylinderCheck is a hardware and software module for measuring the centering error of cylindrical surfaces without contact. Depending on application and OptiCentric® configuration, the following parameters can be recorded using the CylinderCheck module:
- Measurement of wedge errors on cylindrical single lenses
- Measurement of the distance between the vertex line and a reference edge on rectangular cylindrical single lenses
- Measurement of the angle between the vertex line and a reference edge on a rectangular cylindrical single lens
- Measurement of double-sided cylindrical single lenses (clocking angle measurement)
- Lens alignment and bonding of cylindrical single lenses in a cell
- Multilens-Measurement of lens assemblies with cylinder lenses

AspheroCheck®
AspheroCheck® is a hardware and software module that measures the slope and position of an aspherical axis relative to a given reference axis. The upgrade is characterized by:
- Measurement in reference to the optical axis of the asphere or to a reference axis
- Specified reference axis according to DIN ISO 10110-6
- Measurement of lenses with one or two aspherical surfaces
- Sample diameters from 2 mm
- Accuracy up to 5 arcsec (depending on the sample geometry)
- Contact-free measurement

Workstation
With the workstation, the OptiCentric® measurement system is turned into a complete workplace. Alongside integration of the controller and the PC equipment, the workstation provides enough working space for preparing and post-processing the samples. Space and storage areas allow good organization of the workstation.

Worktable S
The worktable is the perfect supplement to table-top devices such as the OptiCentric® 100. The system is thus given a sturdy table where the controller is integrated. The monitor and additional PC equipment are attached and can be operated close to the system.
MultiLens: Measurement and alignment of objectives towards a freely selectable reference axis
MultiLens is the software module for measuring and aligning lens assemblies. The centering errors of each individual surface of a lens assembly and the centering of the system are determined non-destructively. With this information, the centration of a single lens or a sub-group can be calculated with respect to a freely selectable reference axis
SmartAlign: Correct centering errors automatically
With the SmartAlign Module, the position of the measured centering error is analyzed in reference to a user-defined optical or mechanical axis. This unique tool is used especially successfully in the automated LensAlign alignment modules and bonding systems.

LensVac
The vacuum tweezers LensVac support the safe and clean handling of optical components for the loading and unloading of lenses into trays as well as the insertion of the optical elements into their lens barrel.
- Exchangeable vacuum cups for small & medium sized lenses (up to 100 mm)
- L-shape tweezers for handling under tight space requirements
- Activation via thumb switch
- Compatible with different approaches for vacuum generation (available on request)
Other accessories
- Measuring probe
- For determining the position of optics before adjustment
- Expansion of measurement range to effective focal lengths of up to ±2,000 mm
- Alignment set, calibration wedges
- Samples, traceable by PTB
- Lens holder and ring chucks
- Foot-pedal control for the compressed air
- Tool-stage with kinematic seat for holding the alignment tools
- UV light source, manual bonding unit with foot pedal, automated bonding unit, needles and tubes for the bonding unit
Knowledge Base
Centration measurement, lens alignment, cementing and bonding of lenses
The precise centration and alignment of a lens is crucial for the image quality of the optical system. According to ISO 10110 a centration error is given when the optical axis of a lens do not coincide with a reference axis, respectively these are different in position and direction.
Centration errors occur when cementing, aligning and fixing lenses, so the precise requirements in optical systems can be best met if all manufacturing steps are uniformly designed and incorporated into one measurement and manufacturing system.
More knowledge for experts
This article inspired you? Are you looking for further knowledge transfer?
Then you might also be interested in the following topics …
Centration errors of lens assemblies
Centration errors have a decisive influence on the optical imaging quality of an imaging system. A centration error is present if the axis of symmetry of an optical element does not coincide with a given reference axis. The reference axis of a lens, for example, can be given by the symmetry axis of the mount cell. The centration error is given as an angle between the optical axis of this element and the reference axis. A centration error may also be given as the distance between a center of curvature to another reference point on the reference axis.
The drawing provides an overview of the optomechanical parameters OptiCentric® instruments are capable to measure:
- Translational displacement of a lens
- Tilt of a lens
- Surface tilt error of a spherical surface
- Cementing error
- Tilt of the aspherical axis
- Air gaps and center thicknesseses
OptiCentric® is able to precisely define all of these errors in accordance to ISO 10110-6.
Principle of the centering error measurement in reflection and transmission mode
In order to measure the centration of a lens, it is a requirement that the lens rotates around a precise reference axis. In most cases this axis corresponds to a pivot bearing axis which is decisive for the precise measurement of the centration. In addition, there are two different ways to measure the centration of a lens; a distinction is made between measurement in reflection and in transmission.
Centration measurement in reflection
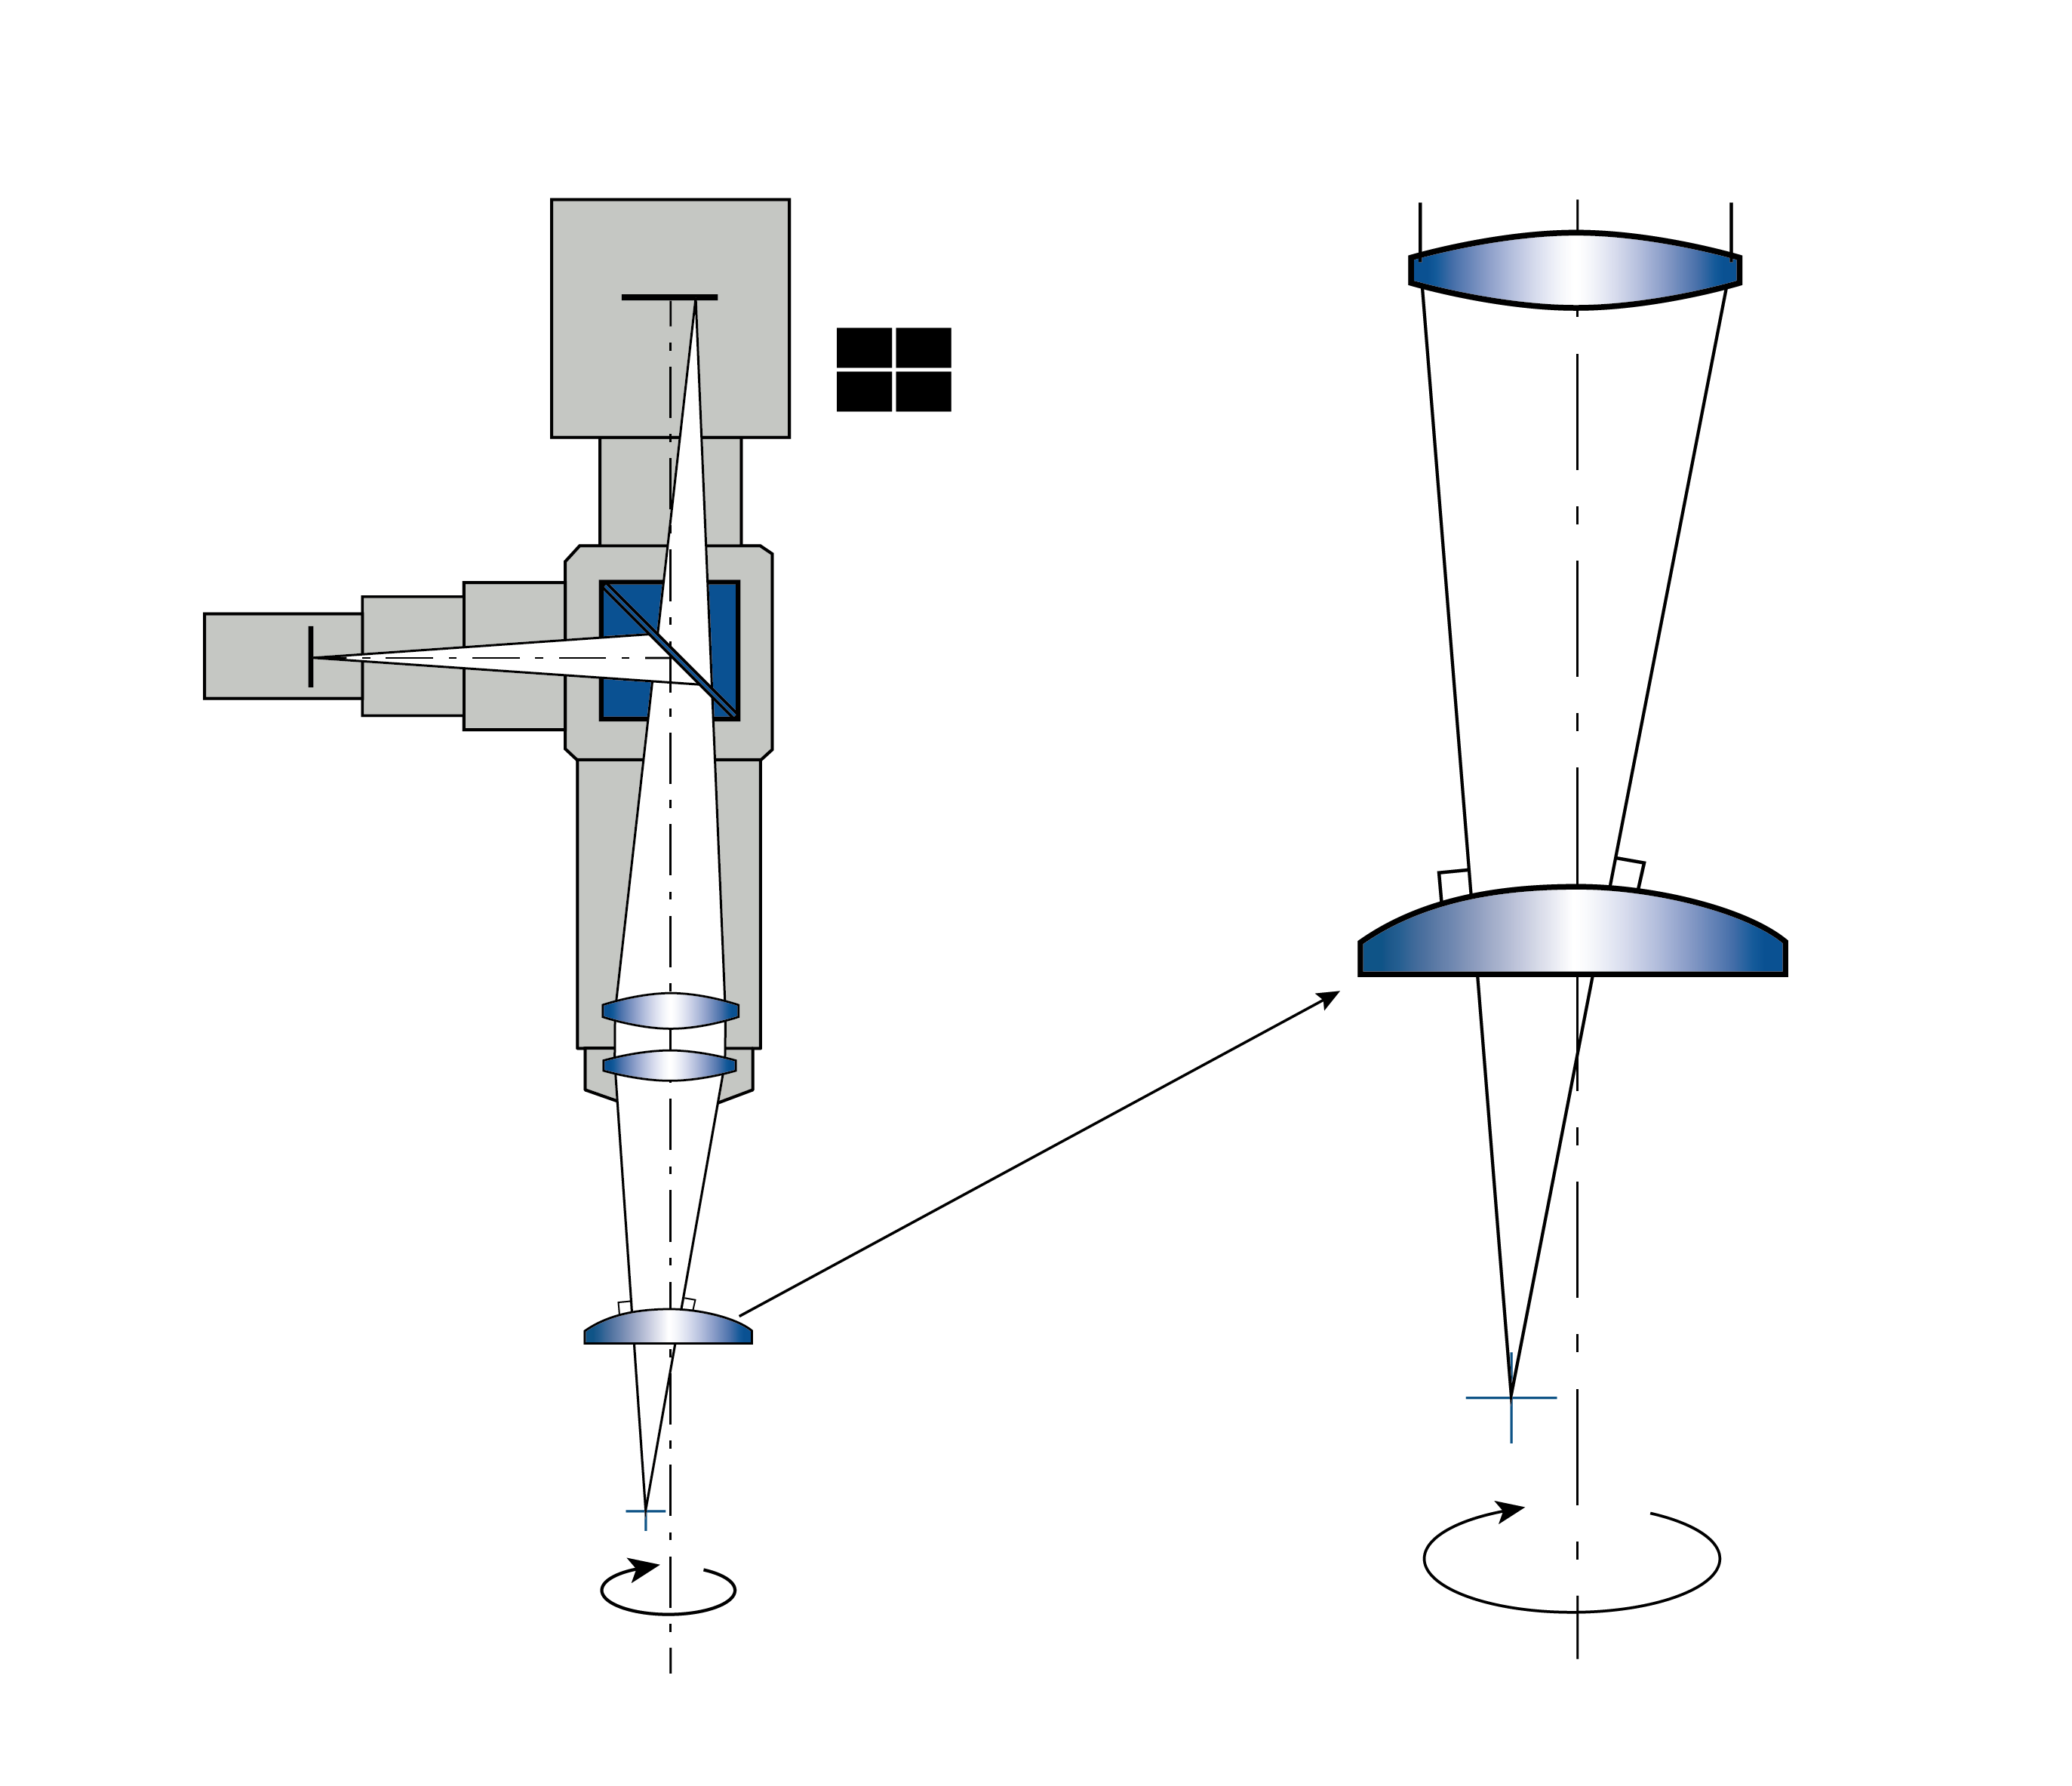
The OptiCentric® system, equipped with an autocollimator head with reticle and corresponding head lens, is used for measurement in reflection.
To perform the measurement the measurement head with the head lens is focused on the center of curvature of the lens surface being tested. The resulting reflected image of the reticle is observed using the camera integrated into the measurement head and analyzed with the software. If there is a centration error, the observed image describes a circle while the sample rotates on the reference axis. The center of the described circle is on the reference axis. The radius of the circle is proportional to the centration error and describes the distance from the center of curvature of the lens surface to the reference axis. If the centration error is described as an angle, this is called a surface tilt error when measuring in reflection. (See also ISO 10110).
Centration measurement in transmission
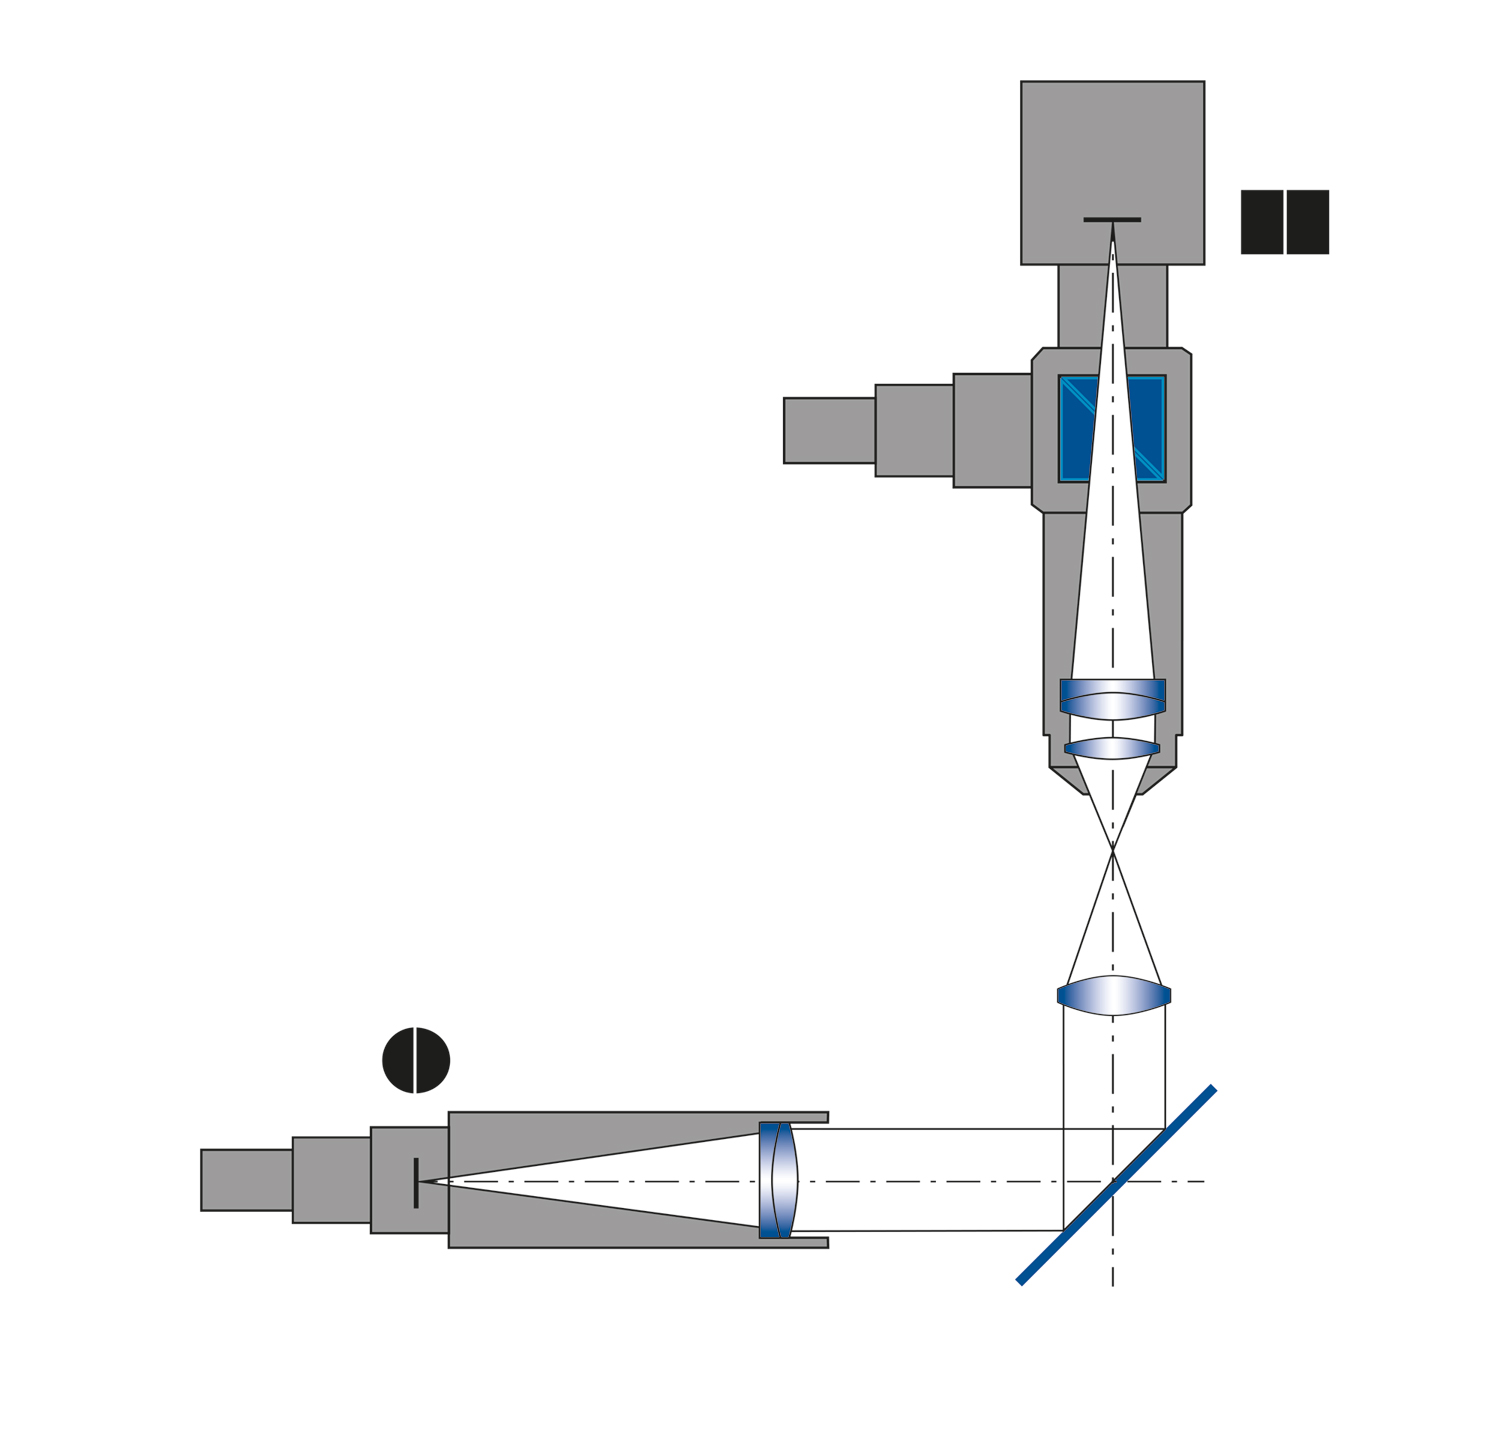
When measuring in transmission the OptiCentric® system is also fitted with the autocollimator head and appropriate head lens. In addition, the system must be fitted with a collimator with reticle in the base of the measurement system for measurement in transmission. During measurement in transmission, the parallel light from the collimator forms an image of the reticle in the sample’s focal plane, which the head lens of the autocollimator head focuses on. The image can then be analyzed using the camera.
If there is a centration error the image describes a circle in the same way as with measurement in reflection. The radius of the circle corresponds to the distance between the reference axis and the focal point. As an angle the centration error can be specified as the inclination of the chief ray when measuring in transmission.
Comparison between reflection and transmission mode
The reflection and the transmission values are different and may be compared only to a limited extent. A simple relationship between the two measurements for the centration error of a single lens (without a mount) is given by:
T = (n – 1) × R
T: Angle deviation in transmission mode
n: Refractive Index of glass
R: Surface tilt error of top surface (Result of measurement in reflection mode)
Using the transmission method it is fundamentally not possible to distinguish which of the lens surfaces is afflicted with a centration error. In certain cases a lens measured in transmission may not display any centration errors, even though the lens is installed askew in the mount. Centration error measurement in reflection provides clear geometrically interpretable results for a single optical surface.
Both methods should be considered to achieve efficient optical production.
Centration Measurement
Centration error of single lenses
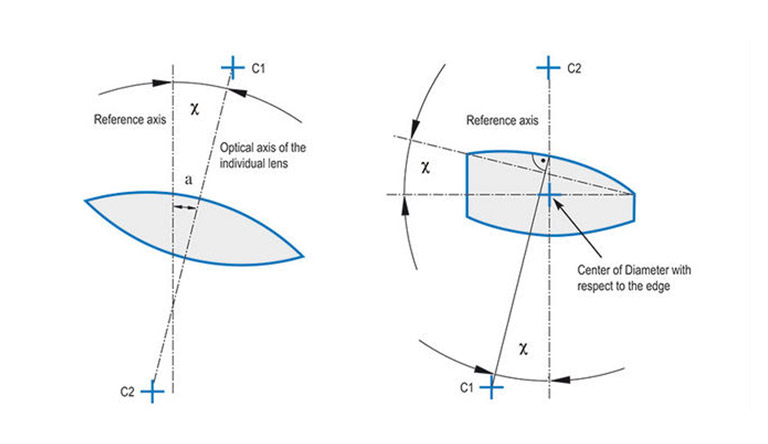
The optical axis of a single lens is the line connecting the centers of curvature of the two spherical surfaces. The centration error is now defined using the angle „χ“ and the distance „a“ to a given reference axis.
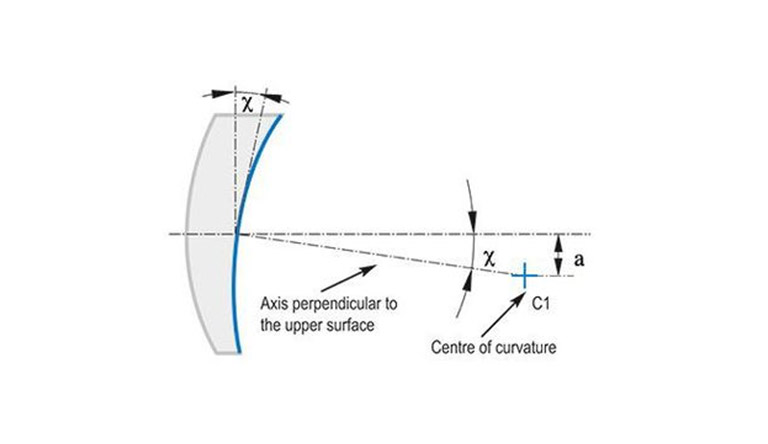
The centration error of a single lens can also be represented relative to the edge of a lens. In this case, the centration error is called the surface tilt error or wedge error of the lens. The reference axis is taken to be a line through one of the centers of curvature and the center of the diameter of the lens. The surface tilt error of the upper surface is given relative to this reference axis.
Centration errors of aspherical lenses
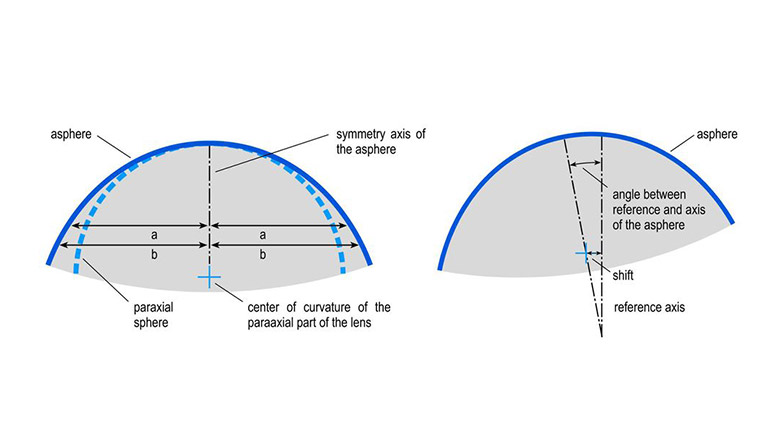
In contrast to spherical surfaces, rotationally symmetrical aspherical surfaces have an axis of symmetry. The goal of centration error measurement is thus the determination of the orientation of this axis of symmetry relative to the reference axis.
To do this, the following two values must be determined for an aspherical surface:
- The shift of the paraxial center of curvature from the reference axis
- The angle of the aspherical axis of symmetry from the reference axis
The shift corresponds to the classical centration error of spherical surfaces, and is measured in the same way using the electronic autocollimator.
For measurement of the angle of aspherical lenses, an additional sensor is needed – for TRIOPTICS, this is the AspheroCheck® sensor. It measures the run out on the outer edge of the aspherical surface. Once the shift and angle of the aspherical surface have been determined, this data can be used to calculate the following parameters:
- Shift and tilt of the asphere relative to the primary reference axis of the measurement system (corresponding to the axis of rotation)
- Shift and tilt of the asphere relative to the “optical axis” of a single lens. The “optical axis” is the line through the centers of curvature of the spherical part of the lens
- Shift and tilt of the asphere relative to a reference axis according to DIN ISO 10110-6, if an additional distance sensor is used
- If a lens consists of two aspherical surfaces: Angle and shift of both aspherical axes
Centration errors of cylinder lenses and anamorphic lenses
The challenges associated with the measuring of cylinder lenses lie in the various forms in which lenses are manufactured. They vary in their surface and base area as well as their mount type.
Characteristic forms of cylinder lenses
Just as spherical lenses, cylinder lenses are roughly divided into categories according to their two optical surfaces. The following types of lenses can be distinguished:
- Cylindrical – plano
- Cylindrical – spherical
- Cylindrical – cylindrical
Mostly, cylindrical lenses are used that are processed plano on one side, also because cylindrical plano lenses can be metrologically characterized much easier. However, also other forms of cylinder lenses as well as lenses can be measured with the OptiCentric® systems.
Since cylinder lenses do not possess a rotational symmetry around an axis, the outer edge of the lens is often not rotationally symmetric. Thus, they can be further divided into:
- Lenses with a square area
- Lenses with a round area
Upon every measurement, the specific lens type plays a crucial role. Depending on the design of the cylinder lens and the measuring task, various sensors and evaluation programs must be implemented to check the accuracy with which the lenses were manufactured. Essentially, all kinds of cylinder lenses can be measured with the OptiCentric® systems.
For a description of the centration error of cylindrical lenses a reference axis must be chosen. This can, for example, be the reference edge at the lens or a chamfer on a mechanical mount, into which the lens was inserted. Therefore, the mount is another distinctive feature by which a cylinder lens can be classified
- Unmounted lens
- Mounted lens
Metrological challenges associated with the measuring of cylinder lenses
Due to the asymmetry of cylindrical surfaces, quality tests of cylinder lenses are considerably more complicated than those of spherical lenses. The center of curvature of a spherical surface is clearly defined by its position that can be easily determined.
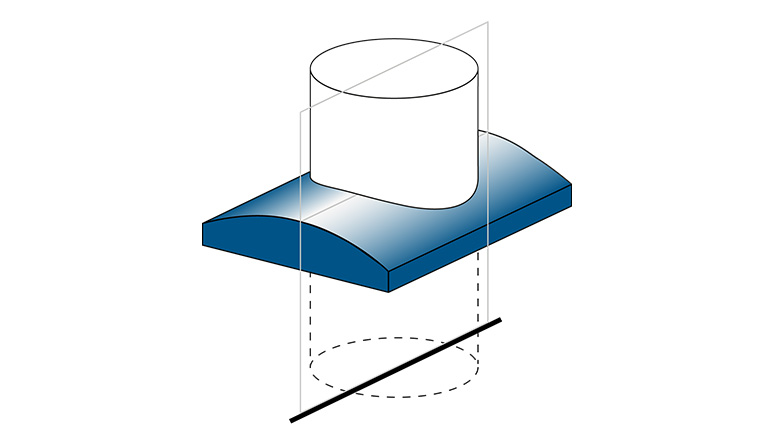
However, a cylindrical lens area shows a radius of curvature only in one direction. In the case of cylinder surfaces, the center of curvature characteristic for spherical surfaces therefore represents a line – here called cylinder axis. This is one reason why the measurement of cylinder surfaces is more complicated than the measurement of spherical lenses. For the evaluation of this cylinder axis, not only its position, but also its alignment must be measured.
In the direction of the uncurved lens surface, a cylinder surfaces reacts just like a plane surface. Therefore, not only errors known from spherical lenses occur during the complete characterization of all attributes of cylinder lenses, but also typical errors known from plano optics. These lens attributes increase the metrological complexity.
For a better demonstration of the characteristic features of cylinder lenses, the position of the cylinder axis is generally referred to as apex line. This line corresponds to the cylinder axis projected along the optical axis on the lens surface.
Centration errors of optical surfaces within an assembled lenses
In order to measure single optical surfaces, the exact tilt error and/or exact position of the center of curvature to a given reference axis has to be determined. Influences from optical surfaces and elements located before the surface under test are taken into account using optical calculation including the centration error of these surfaces. That means that the centration error of all further surfaces must be iterated from that of the first.
Typically, up to 20 surfaces can be measured from one side using this method. If a second measuring head is used, such as in the OptiCentric® 100 Dual, which calculates the centration error from the bottom side, more than 20 optical surfaces can be measured.
For this application a special software module MultiLens® has been developed. The MultiLens® measurement provides the exact XYZ coordinates of all centers of curvature in the space. The measured data support further analysis of the lens system and additionally provide the following data:
- Calculation of the optical axis of any single lens of the system.
- Assessment of the optical axis of single sub systems or the entire optical system
- Calculation of the distances and angles between optical axis and „best fit“ line.
- Calculation of the position single lenses and lens group with respect to a mechanical axis.
Centration errors of infrared lenses
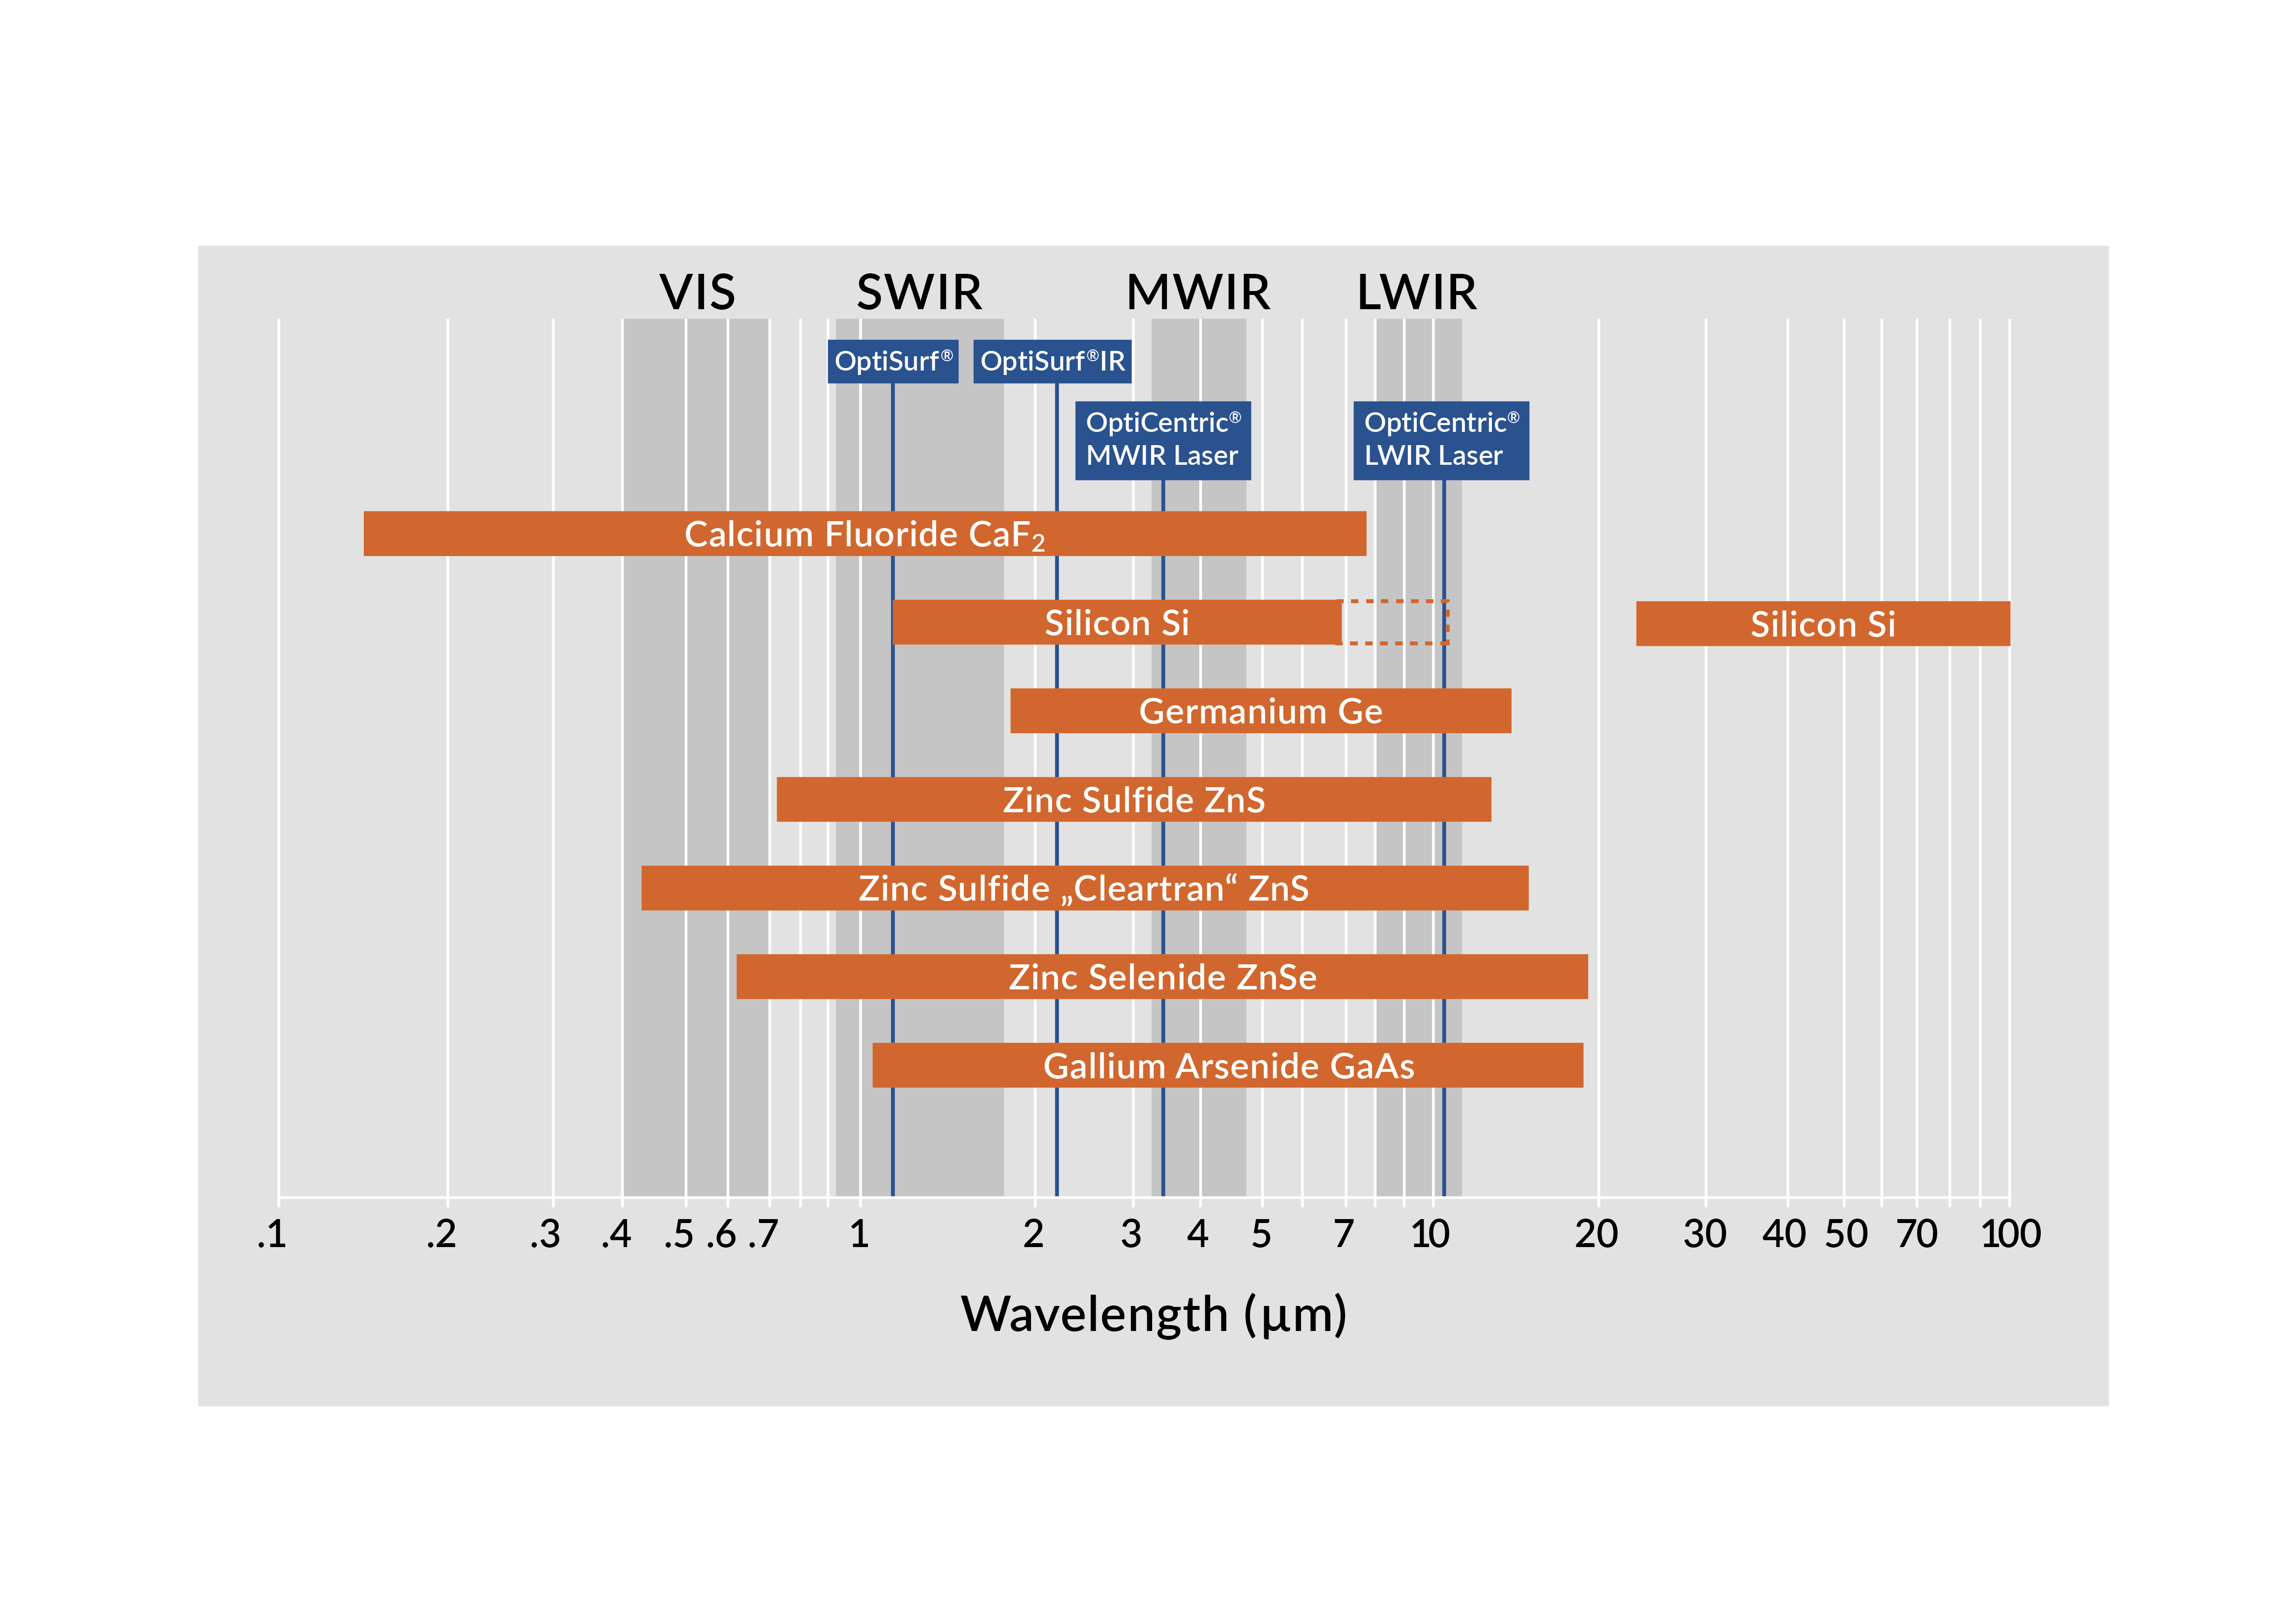
For testing single lenses and completed assemblies that are only transparent in the infrared range, TRIOPTICS provides measurement heads specifically designed for the infrared wavelength ranges. Typical applications include the testing of lenses and assemblies for civil and military applications. Lens materials such as Ge, Si, ZnSe, ZnS or CaF2 are used in particular for use in thermal imaging and residual light systems.
Infrared spectral ranges
The infrared wavelength range is divided in three distinct ranges for imaging applications. These bands exhibit high transmission of light through air and are separated by strongly absorbing bands in the spectrum. The three imaging infrared ranges are: short wave infrared (SWIR) from 0.9 to 1.7 µm, medium wave infrared (MWIR) from 3 to 5 µm and finally long wave infrared (LWIR) from 8 to 12 µm wavelength. Since the centering error measurement in reflection provides geometric information about the lens system to be examined, the wavelength of the light source used for the measurement is independent of the actual design wavelength of the optics. Instead, the appropriate autocollimator can be selected based on the transmission bands of the materials used and the surface coatings.
For an overview about compatible materials and the wavelength regions covered by the available measurement heads please refer to adjactent drawing. Silicon is a special case as the trans-parent region depends on the doping level and dopant type, so a LWIR head might be a suitable depending on application.
Differences to VIS from the operator side
In contrast to VIS systems, the light emitted from the focused autocollimator head cannot be seen by the naked eye which is however no problem in practice for aligning the sample. Apart from that, the operation of the infrared systems is not different to the VIS systems, so a user can be quickly trained for a new wavelength range.
Differences to VIS from a technical perspective
From a technical side, apart from using suitable optics and illumination sources in the measurement heads, the most important difference between visual and infrared range is that in the infrared range every object, including the sample, emits light in this wavelength region, so the instrument needs to compensate for the thermal background before taking a measurement. This is done automatically by the software and requires no operator intervention. Also, the contrast between background and illuminated areas is lower than in the VIS, so specialized image processing algorithms are used to reach the required high resolution.
OptiCentric® in the standard reflection mode relies on back-reflection from the lens surface, so the light intensity of the reflected reticule image strongly depends on the type of coating used. Typically, all infrared imaging lenses are AR-coated, however there is a wide variation in efficiency which the instruments compensates by adjusting illumination power and shutter times where available.
In general, the typical accuracy of the centration error measurement is approximately 1 µm, slightly higher than for the instruments in the VIS, which is due to the longer wavelength and larger pixel size of the cameras used in the autocollimators.
OptiCentric® for Alignment
Centration measurement, alignment and bonding for mounting lens in cells
SmartAlign for efficient lens alignment, cementing and bonding of lenses
The SmartAlign algorithm is part of the OptiCentric® software and ensures that the lenses can be aligned to any arbitrary reference axis. Depending on the manufacturing process, the reference axis is defined for example as the optical axis of the bottom lens of an doublet, as the axis of rotation or the axis of an arbor. Because of this flexibility, it is possible to adapt the OptiCentric® Cementing and Bonding Stations to a wide variety of manufacturing processes of our customers.
OptiCentric® Bonding 5D
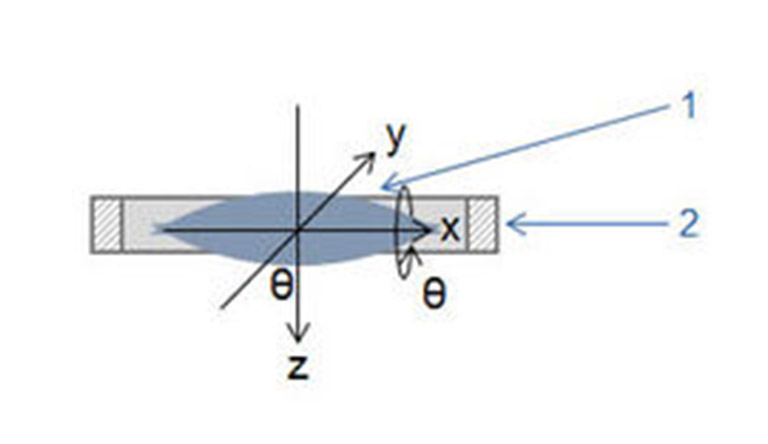
OptiCentric® Bonding 5D permits alignment in five degrees of freedom.
- 2 lateral translations
- 2 tilt angles (θx, θy)
- 1 axial translation (z)
Method steps with OptiCentric® Bonding 5D:
- The adhesive is applied and the positions of the axes of the lens and mount are measured
- The lens is aligned in four degrees of freedom: x, y, θx, θy
- The axial distance between the apex of the lens and a reference surface is measured and the lens is axially aligned
- The adhesive is cured
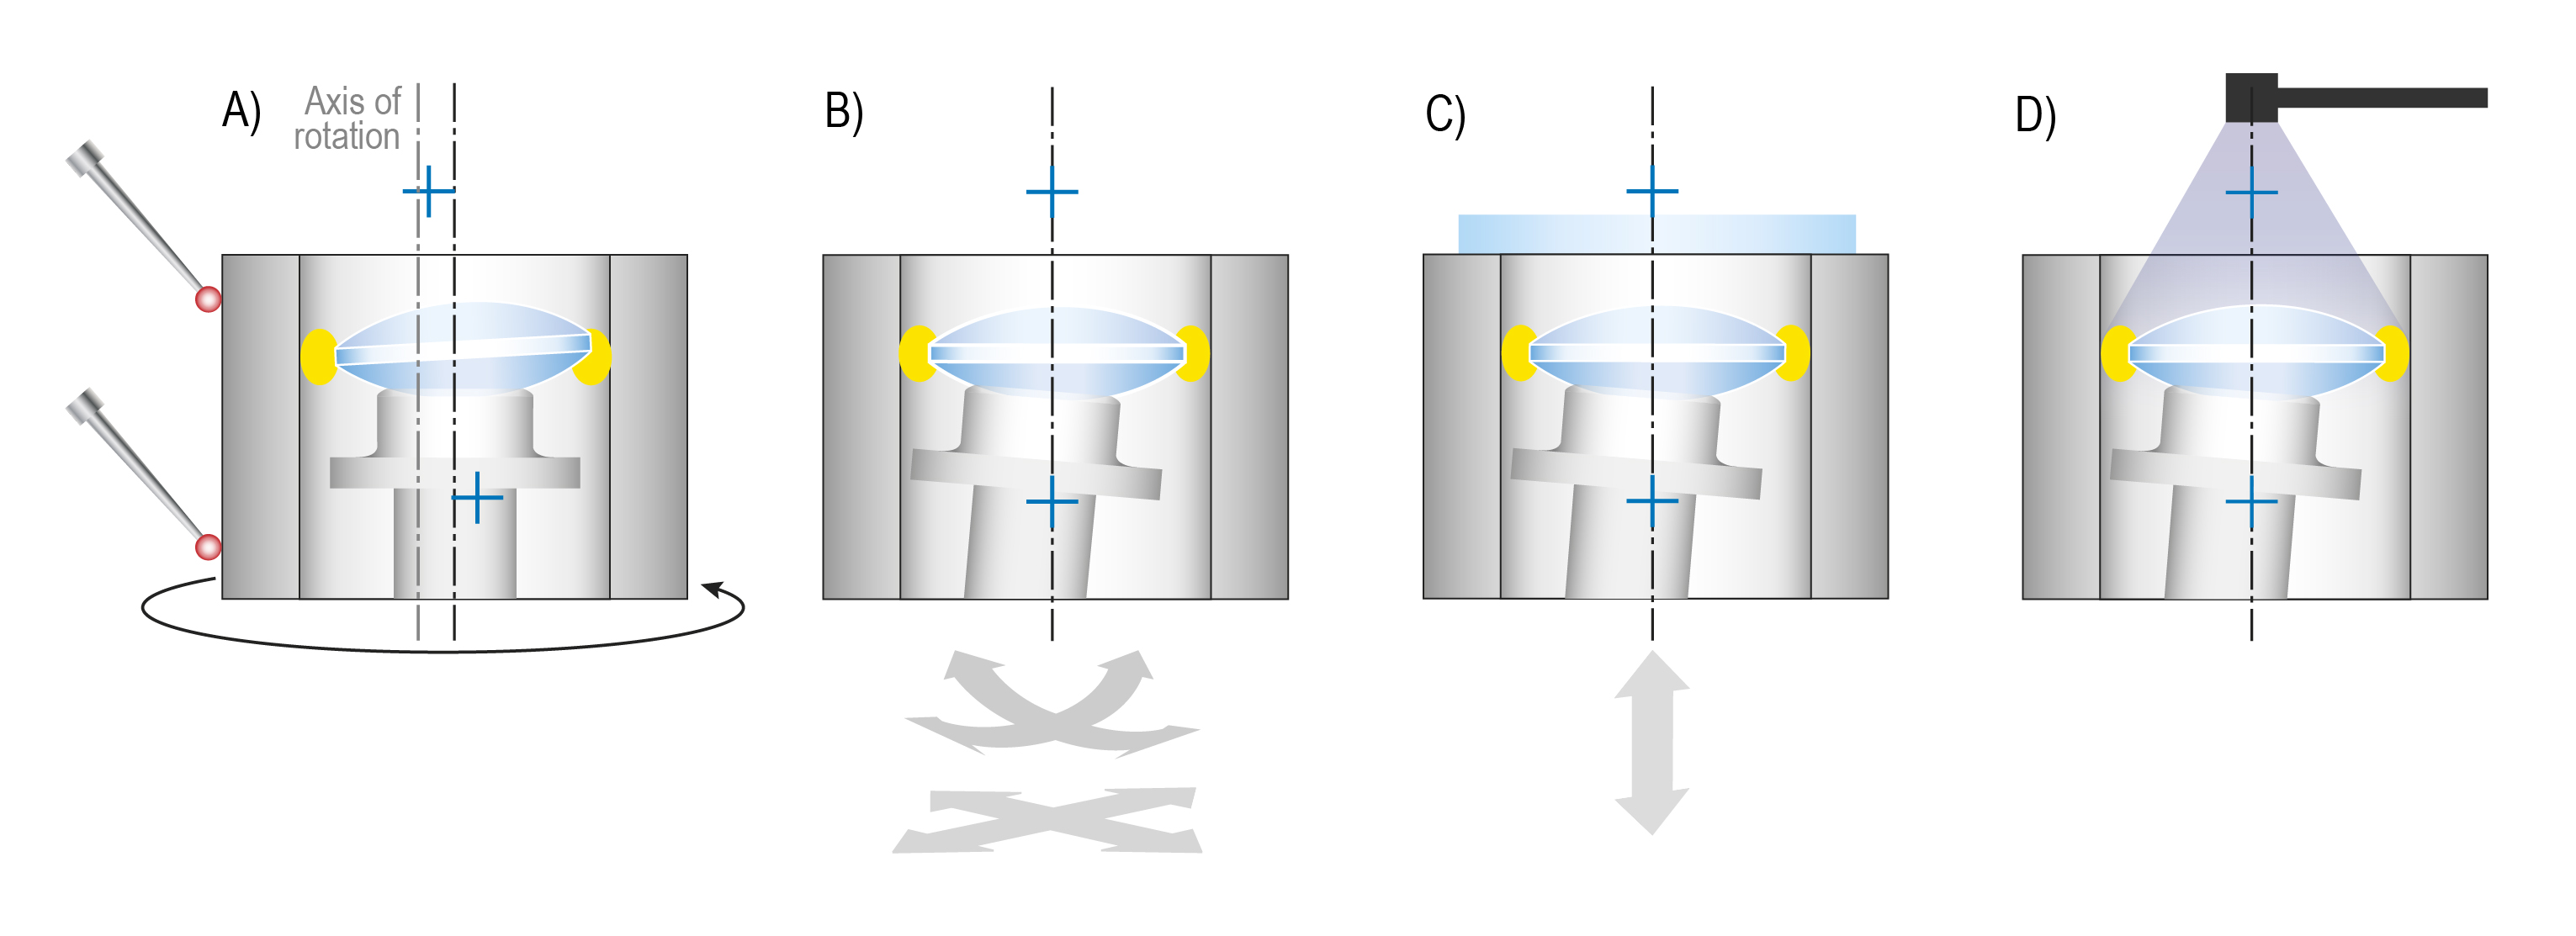
The lens is positioned free-floating in the cell and aligned following adhesive application. The lens is automatically positioned within the cell automatically so that the optical axis of the lenses and the symmetrical axis of the cell correspond with respect to tilt and shift. In addition, OptiCentric® Bonding 5D determines the axial distance in the z-direction between a reference surface (flange) and the lens vertex and then shifts the lens also axial to the target position. By means of SmartAlign technology, the lenses can be aligned to a freely chosen optical or mechanical reference axis. Depending on the production process, the reference axis is defined as the optical axis of a lens or as the rotation axis of a cell. SmartAlign technology thus saves a great deal of time in the alignment process and offers maximum flexibility in the manufacturing process. Pre-alignment of the lens is not required.
The adhesive is then cured, normally with UV light. The special adhesive properties must be taken into consideration here, of course, as they influence final positioning.
With OptiCentric® Bonding 5D, the entire process of lens alignment and bonding can be automated. Highly accurate results of < 1 µm in x, y, z axes and < 2 arcsec in θx, θy can be achieved, regardless of the operator, with existing know-how – including adhesive shrinkage. The method is suitable for all cell materials and is independent of cell geometry. OptiCentric® Bonding 5D can be quickly converted to different sample types with great flexibility. This technology is also particularly suitable for clean room applications.
The new process necessitates a new way of thinking, both in the manufacturing process and in the designing of samples. If a recess is no longer required in the cell, it can still be useful for receiving the sample. However, it must be ensured that the lens does not lie on the recess, but instead “floats” a few micrometers above it.


